
Ihana viikko Middelaldercentretissä on takana ja myös tällä kertaa mukana oli uusi mekko. Se on tehty Herjolfsnes – haasteeseen (ja tarpeeseen!) ja siitä tuli oikein kiva. Onnistuin viimein tekemään vaatimattoman ja yksinkertaisen perusmekon. Tällä kertaa ei tullut epähuomiossa kirkkaanpunaista mekkoa laahuksella. Tämmöinen luonnonvärinen ja vaatimaton mekko on käytännöllinen, monikäyttöinen ja sellainen jota olen kauan kaipaillut.
Mekko on periaatteessa Herjolfsnesin D10581 (Vanha numero 39), kolmella muutoksella. Halusin pitkät hihat, koska en halunnut tästä päällysmekkoa. Sopiva hiha löytyi mekosta 38. Mekko on alkuperäistä pidempi (vähän ylipitkä) käytännön- ja makusyistä. Kaula-aukkoon en tehnyt pientä lovea nyörinreikineen – tyyli- ja kangassyistä.
Kankaana oli Naturtuchen harmaa ohuehko villa, jonka viimeistelyssä villaa on venytetty äärimmäisen pinkeäksi. Kangas on miellyttävä, mutta joissain kohdissa hämmentävän vino. Siis niin, että lankasuorakin on vino. Vinouden kanssa onnistui ommellessa säätämään niin ettei se haitannut, mutta kaula-aukon osalta pelkäsin, että se pieni viilto menisi kuitenkin jotenkin itsestään vinoon.
Jokaisessa mekkoprojektissa oppii uutta. Niin tässäkin. Ompelemisessa meni kauemmin kuin missään mekossa aiemmin, koska iso osa saumoista on ommeltu oikealta puolelta. Se on hitaampaa kuin mekon ompelelminen kokoon nurjalta puolelta etupistoilla. Etuna kuitenkin on mukavan näkymättömät ja litteät saumat sekä mainio hallinnan tunne tarkkutta vaativissa kohdissa. Valitsin tämän ompelutekniikan siksi, että myös alkuperäisten mekkojen sanotaan olevan ommeltu oikealta puolelta.
Lisäksi huolittelin osan saumoista itse kehräämälläni langalla (!! Merkittävä askel henkilölle joka on aiemmin tunnettu myös maailman surkeimpana kehrääjänä). Saumoissa on yhteensä neljää erilaista villaompelulankaa. Vaihdoin lankaa ompeluprosessin aikana aina kuin löysin paremman, mutta ei langan vaihtelu hirveästi näy, niin fiksuja ovat nämä saumat! Villalangalla ompelu on aika mukavaa. Pellavalankaan verrattuna saumoista tulee jotenkin pehmeämmät ja ne uppoavat kankaaseen.
Mukava uutuus oli myös pyöreäkärkinen ”kalanpyrstökiila” joka paitsi näyttää kivalle, voi osoittautua käytössä vähemmän herkästi kärjestä repeäväksi. Aiemmin olen versioinut niitä grönlantilaisia mekkoja, joissa sitä ei ole.
Alla lisää kuvia ja huomioita!
*************** ENGLISH************
We had a lovely week at Middelaldercentret and also this year it marked the debut of a new dress. This was my finally finished dress for the Herjolsnes-challenge. And a dress that I really needed! I finally made a modest and simple basic everyday dress. This time my attempts at a working dress didn’t end up producing a bright, luxuriously red dress with a train. I’m happy with the result – it’s really practical and something you can use pretty much with any dress and doing everything.
The dress is basically a Herjolfsnes D10581 (Old number 39), with three major alterations. I wanted long sleeves, because I wasnted to use this not as an overdress but as a middle layer (over shift, under the overdress). A suitable sleeve was found in dress 38. The dress is longer than the original for practical and style reasons. I also left out the little notch in the neckline due to style and fabric-related reasons.
The fabric I used was Naturtuchen’s natural gray wool, which has somehow been really really stretched when it has been finished. It’s hard to explain, really, but this stretch in the fabric makes it …um…. sort of….wonky. When I cut it completely straight on the grain it was still somehow diagonal. I managed to work around this characteristic when I was sewing it, but was too afraid to include the notch in the neckline. I was sure that would have been pushing my luck and I would have ended up with a crooked notch in front and center of the dress.
Every project teaches me something new. So did this one! Sewing this dress took longer than any other because most of the seams are sewn from the right side. It is much slower than sewing the dress with running stitches on the inside of the dress. However, the advantage is the invisible and flat seams, as well as an excellent sense of control when sewing, especially in tricky places like on gores and the sleeves. I went with this technique because the original dresses are also said to be sewn like this.
Also, I finished some of the seams using yarn I had spun myself (!!! a huge step for someone formerly known as the worst spinster in the world) There is a total of four different wool yarns that I used when I was sewing the dress. I changed the thread during the sewing process every time I found a better one. But because the seams are so clever, the thread (and where I change it) hardly shows. I usually sew with linen thread so I’m still experimenting with wools to find my favourite kind. Sewing with wool Herjolfsnes-style is pretty nice. Compared to linen, the seams are softer and they blend into the fabric (and are much harder to undo if something has gone wrong.).
A nice novelty was also a round-pointed ”fishtail” gore that not only looks neat and makes for an interesting detail, but I think the shape may be less sensitive tears at the top of the gore. This is a detail on the Greenland dresses I haven’t recreated before, because it hasn’t been on the ones I have worked on before.
Scroll down for more pictures and observations! (English in Italic)

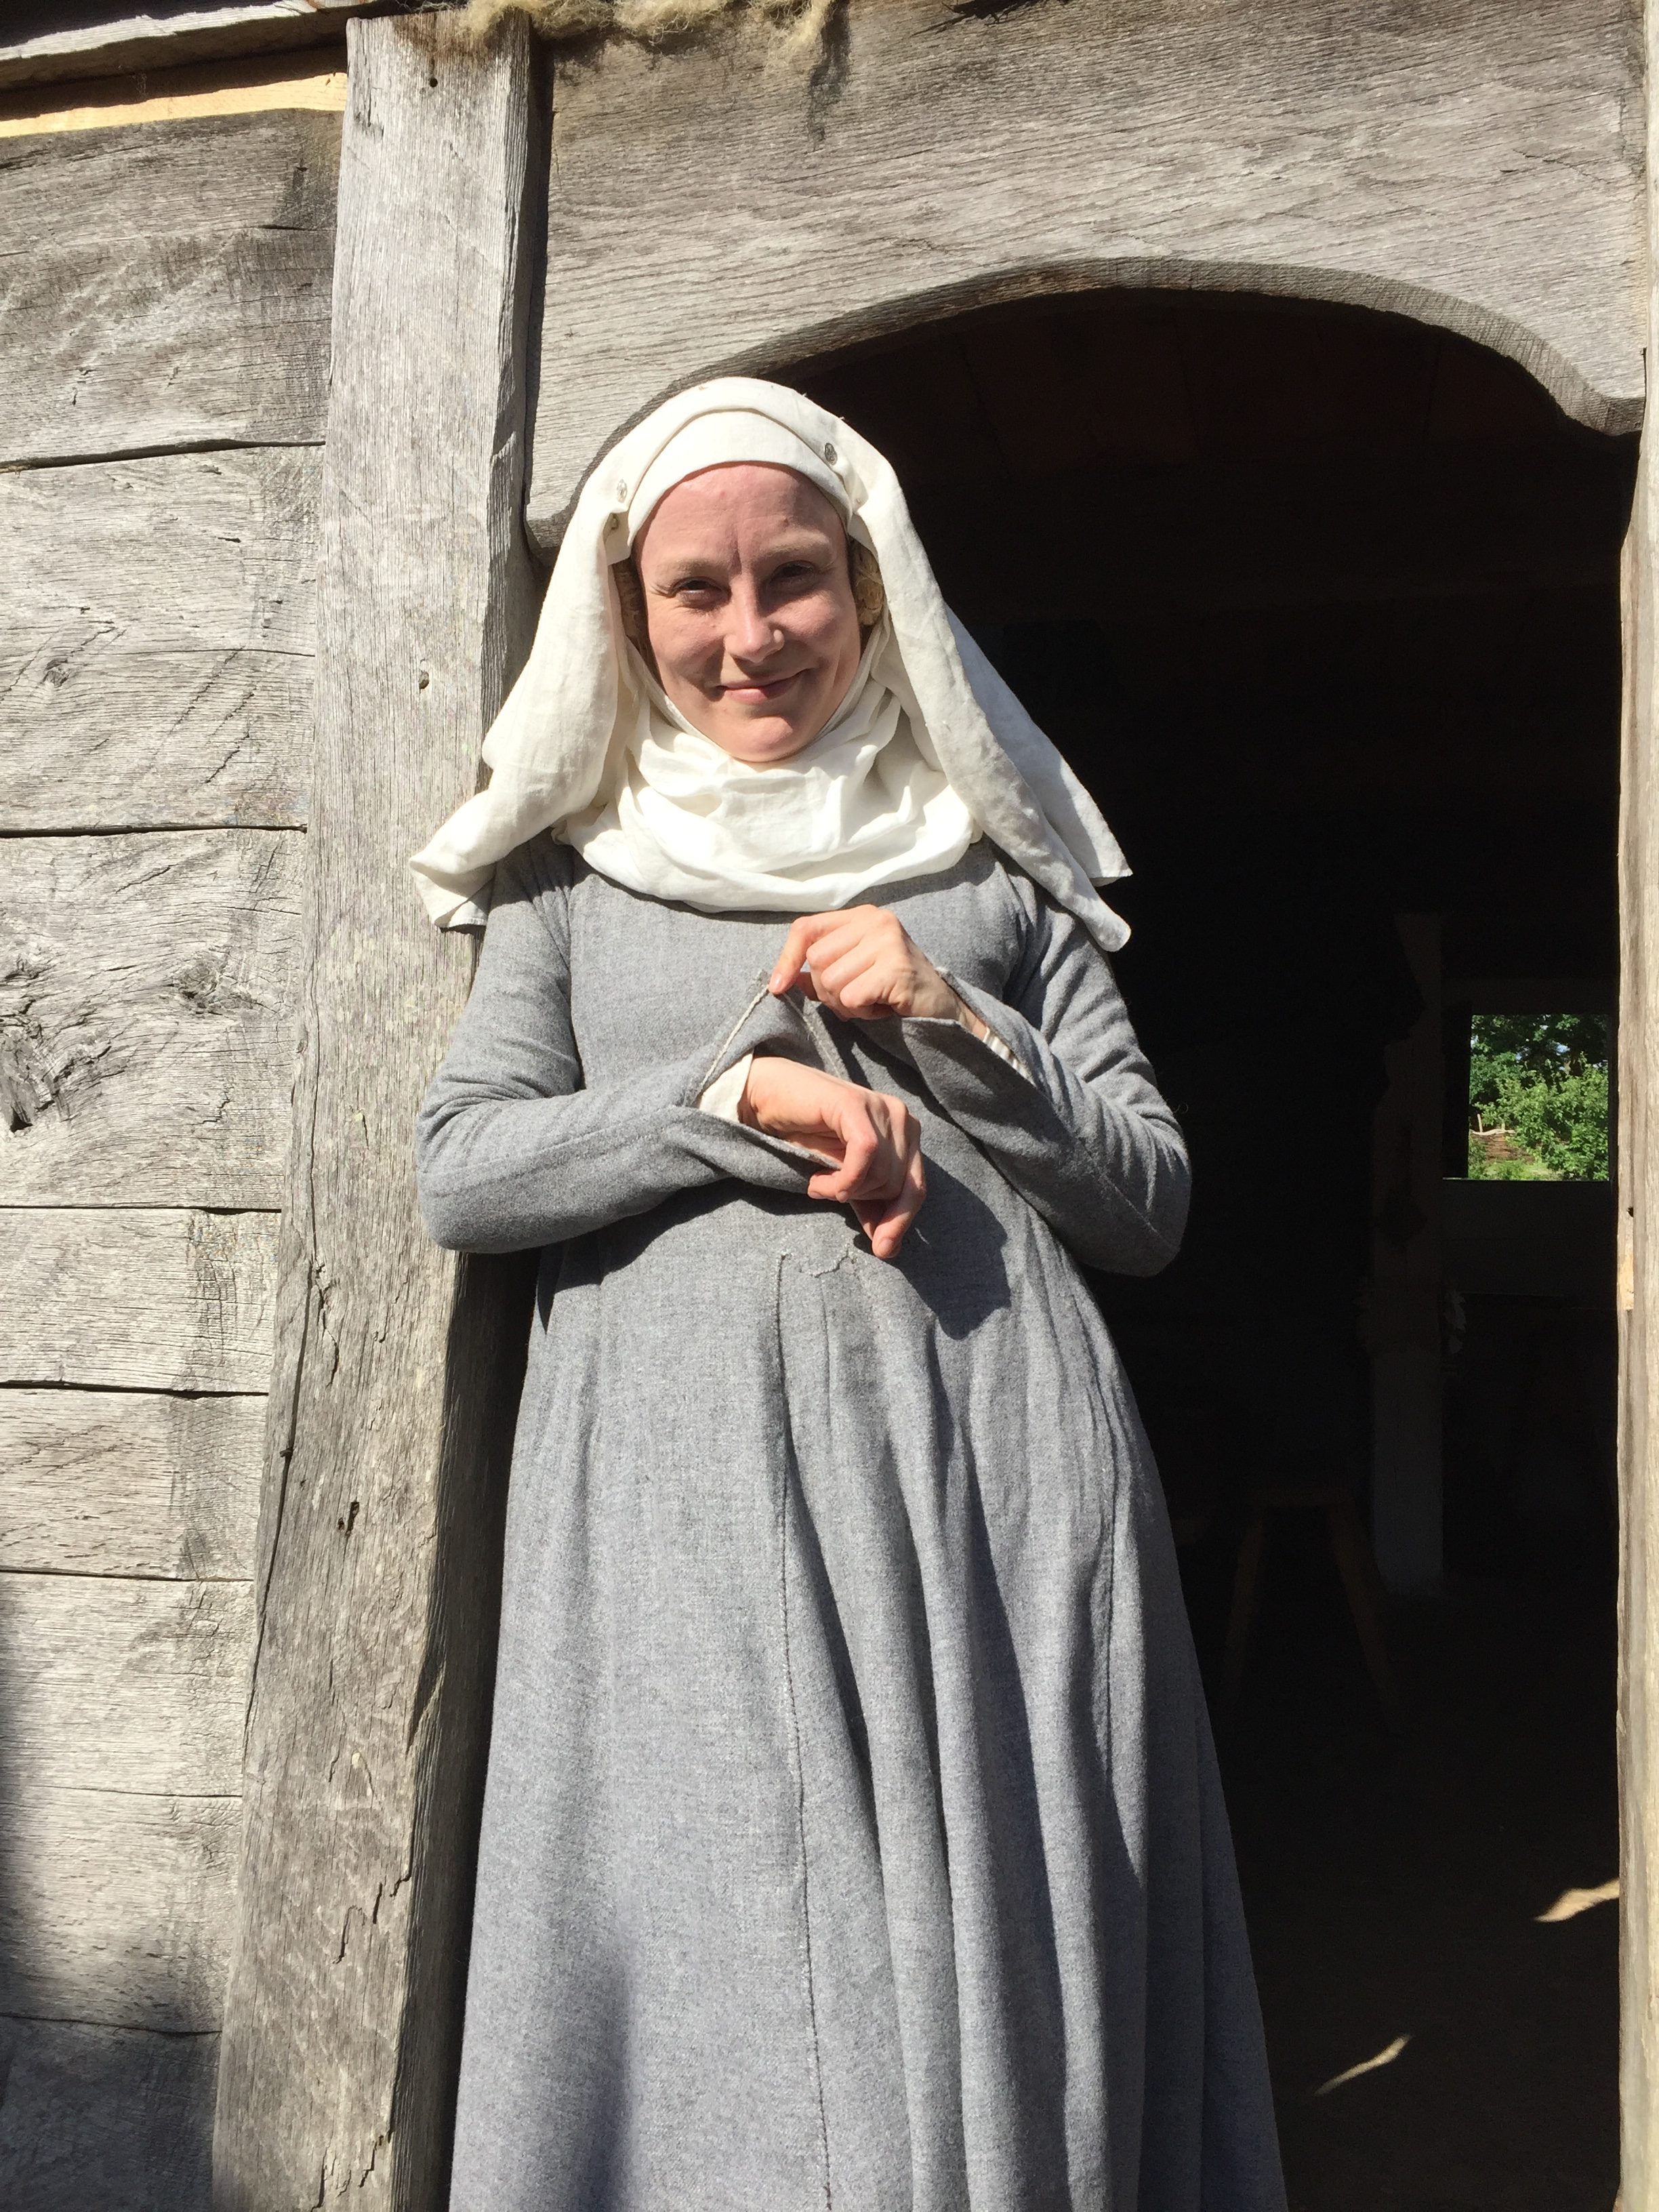
Muistin mekon kuvaamisen vasta viimeisenä päivänä, joten tässä vaiheessa mekossa näkyy kurttuina vyön painauma. Sateisina päivinä varjelin helmaa nostamalla sen vyölle makkaraksi. Kuten kuvasta näkyy, mekko ei ole varsinaisesti istuva, varsinkaan vyötäröltä, mutta yläosa on sen verran napakka että se pysyy paikoillaan. Kankaan takia siitä tuli oikeastaan yllättävänkin napakka, sillä kangas jousti villatoimikkaaksi tosi vähän.
I remembered that I wanted pictures for this post at the very last day of the week – after a week of wearing the dress hiked up onto a roll with my belt on rainy days. The wrinkles at my waist show where the hem has been hiked up. As you can see in this picture, the dress is not really fitted – especially not at the waist. But the top part is snug enough to keep it well in place. And because the fabric had very little stretch for a wool twill, it became a bit more snug than even intended!
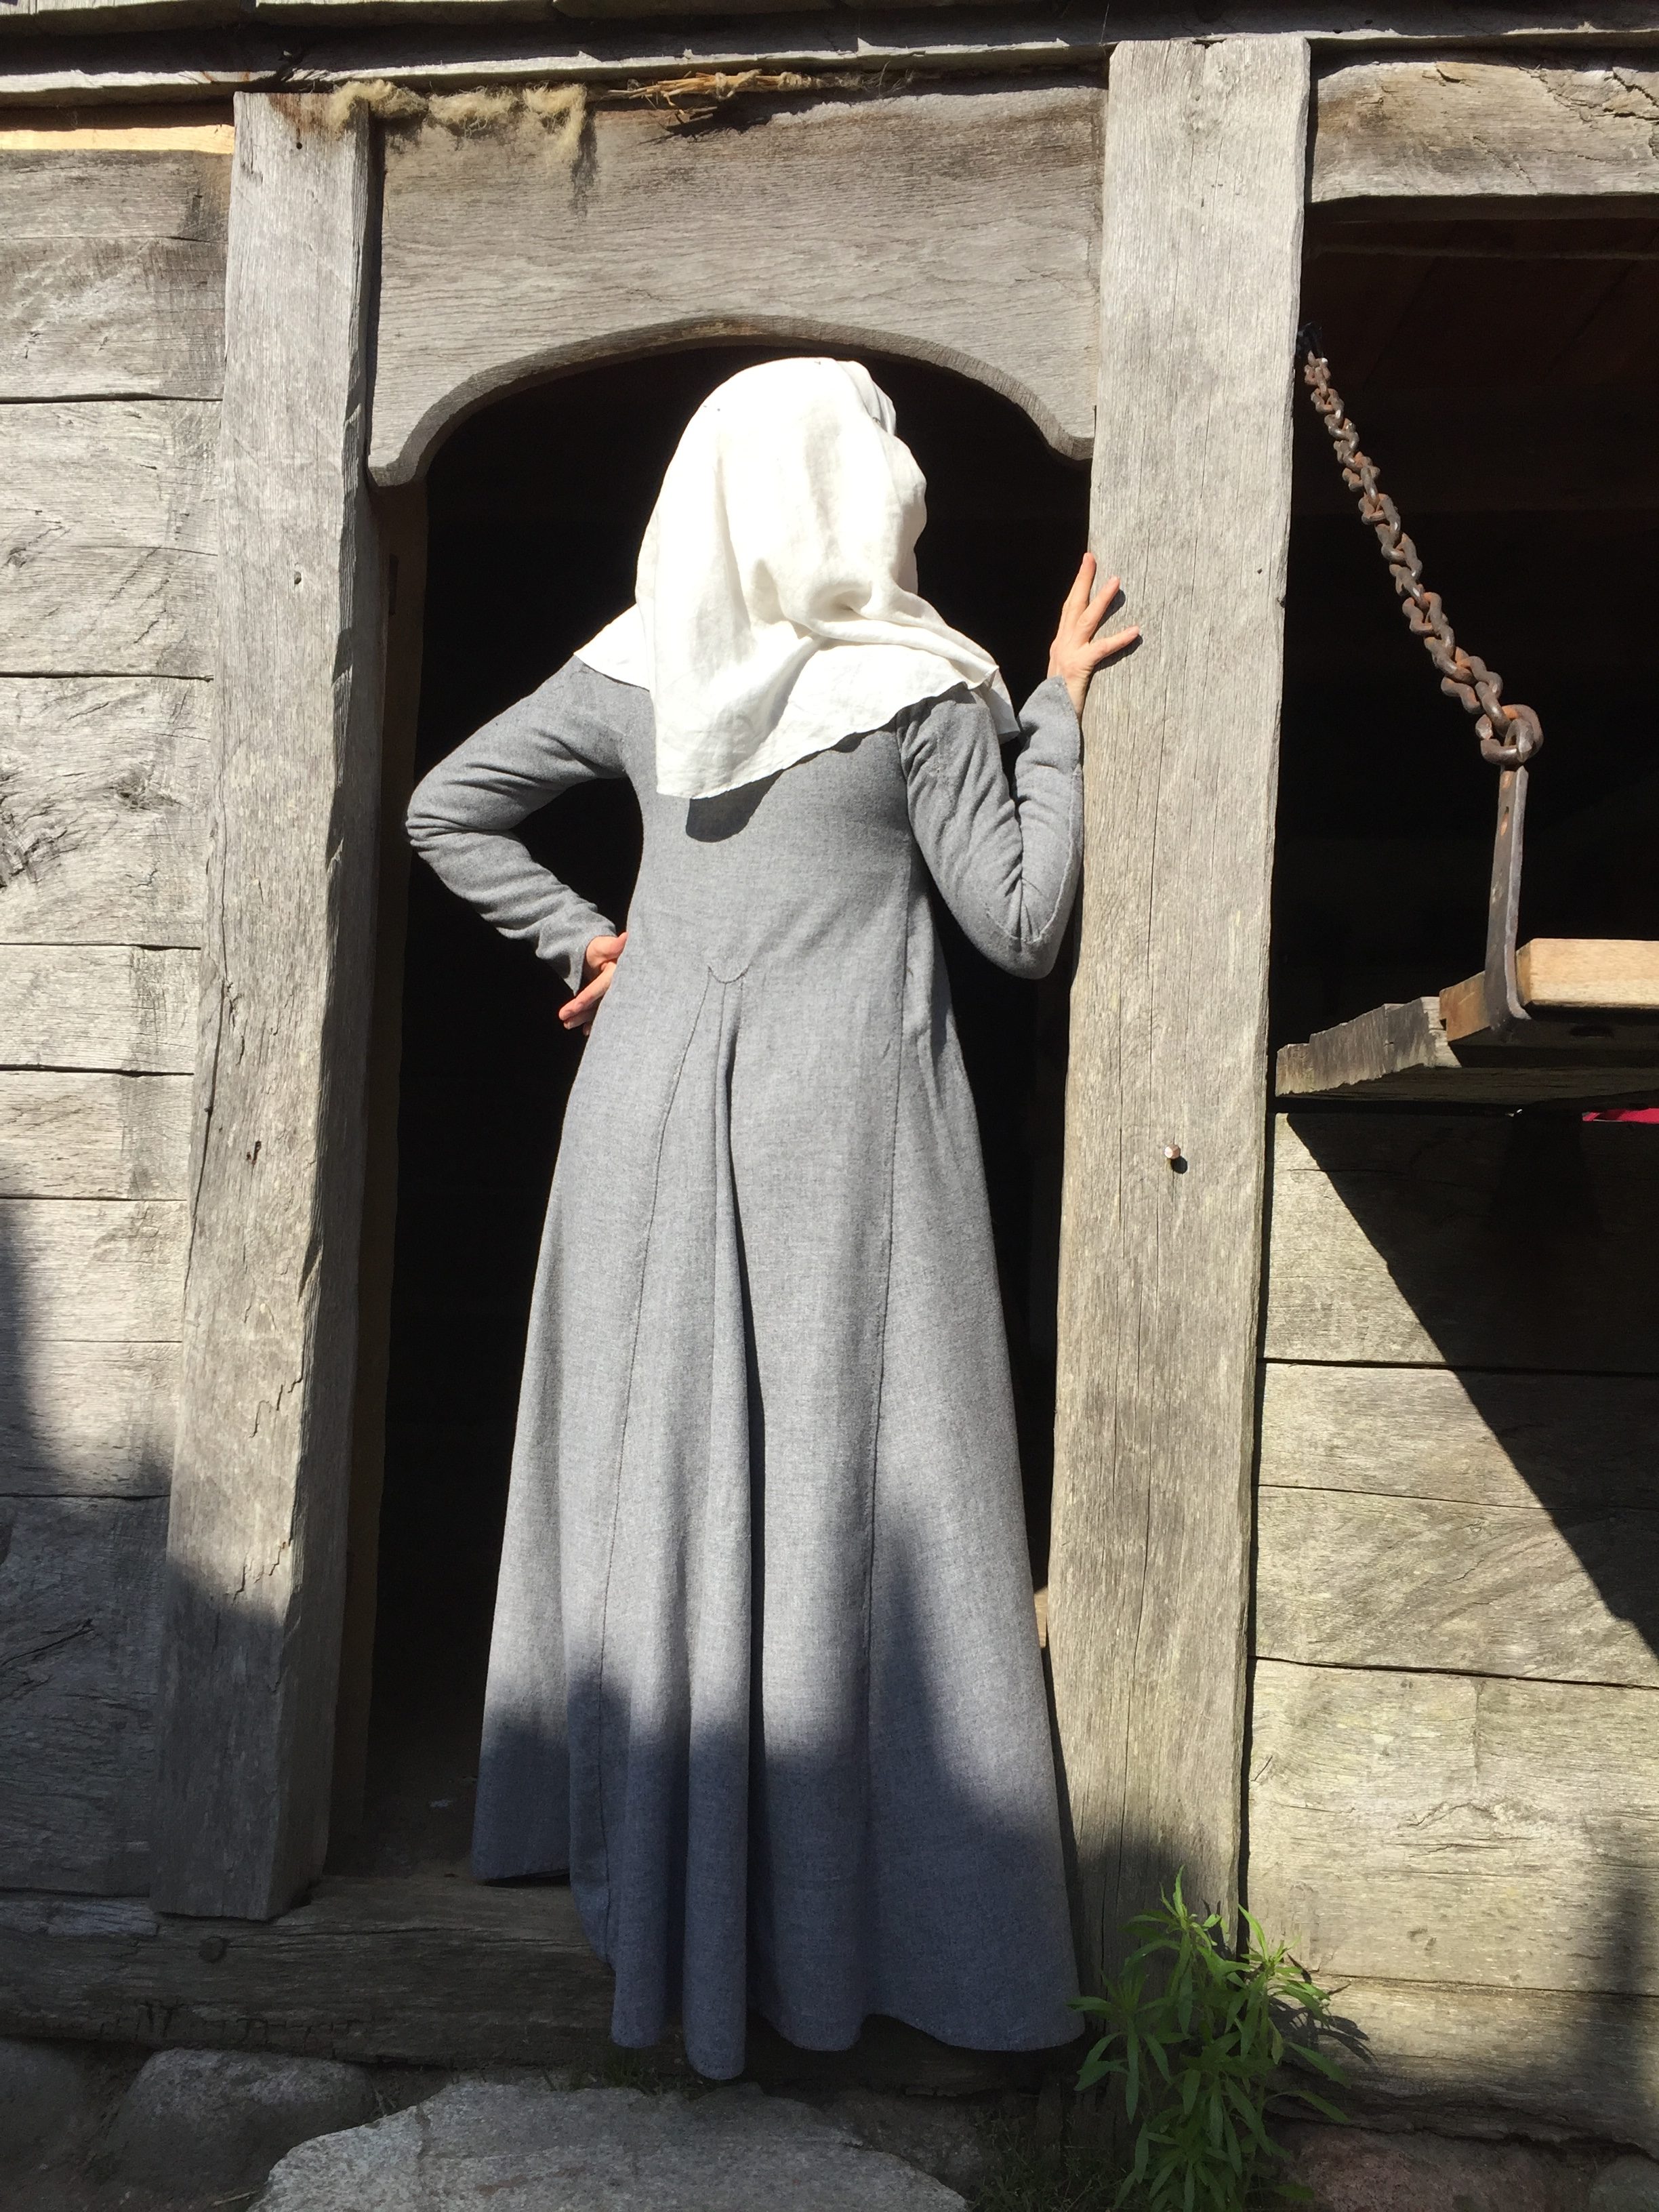
Sama takaapäin. Vyön kanssa (ylin kuva) mekko on ihan toisen näköinen, kiva käyttää sekä ilman että vyön kanssa.
The back. With a belt (topmosti picture) the dress looks quite different, I like wearing it both with and without a belt.

Tein tai oikeastaan jätin ensimmäistä kertaa hihoihin halkiot, kuten monissa alkuperäisissä mekoissa. Ne vaativat vähän totuttelua, mutta olivat aika näppärät hihat piti saada töiden tieltä ylös. Nämä halkiot ovat vain noin 12-senttiset, mutta Herjolfsnesin löydöstä löytyy hihoja joissa on jopa 18 cm halkiot, eikä niissä näy jälkiä kiinnityksestä. Olisi kiva tietää, miten niiden kanssa toimittiin.
Quite a lot of the Herjolfsnes garments have slits on the sleeves, but this was the forst time I’ve recreated them. Wearing them required a little getting used to, but they are very practical when you need to get the sleeves out of the way when working. They are about 12 cm’s so not even the deepest sleeve slits in the Greenland material. So far the research hasn’t shown evidence of them being closed up for wear. It would be interesting to know how they wore them.
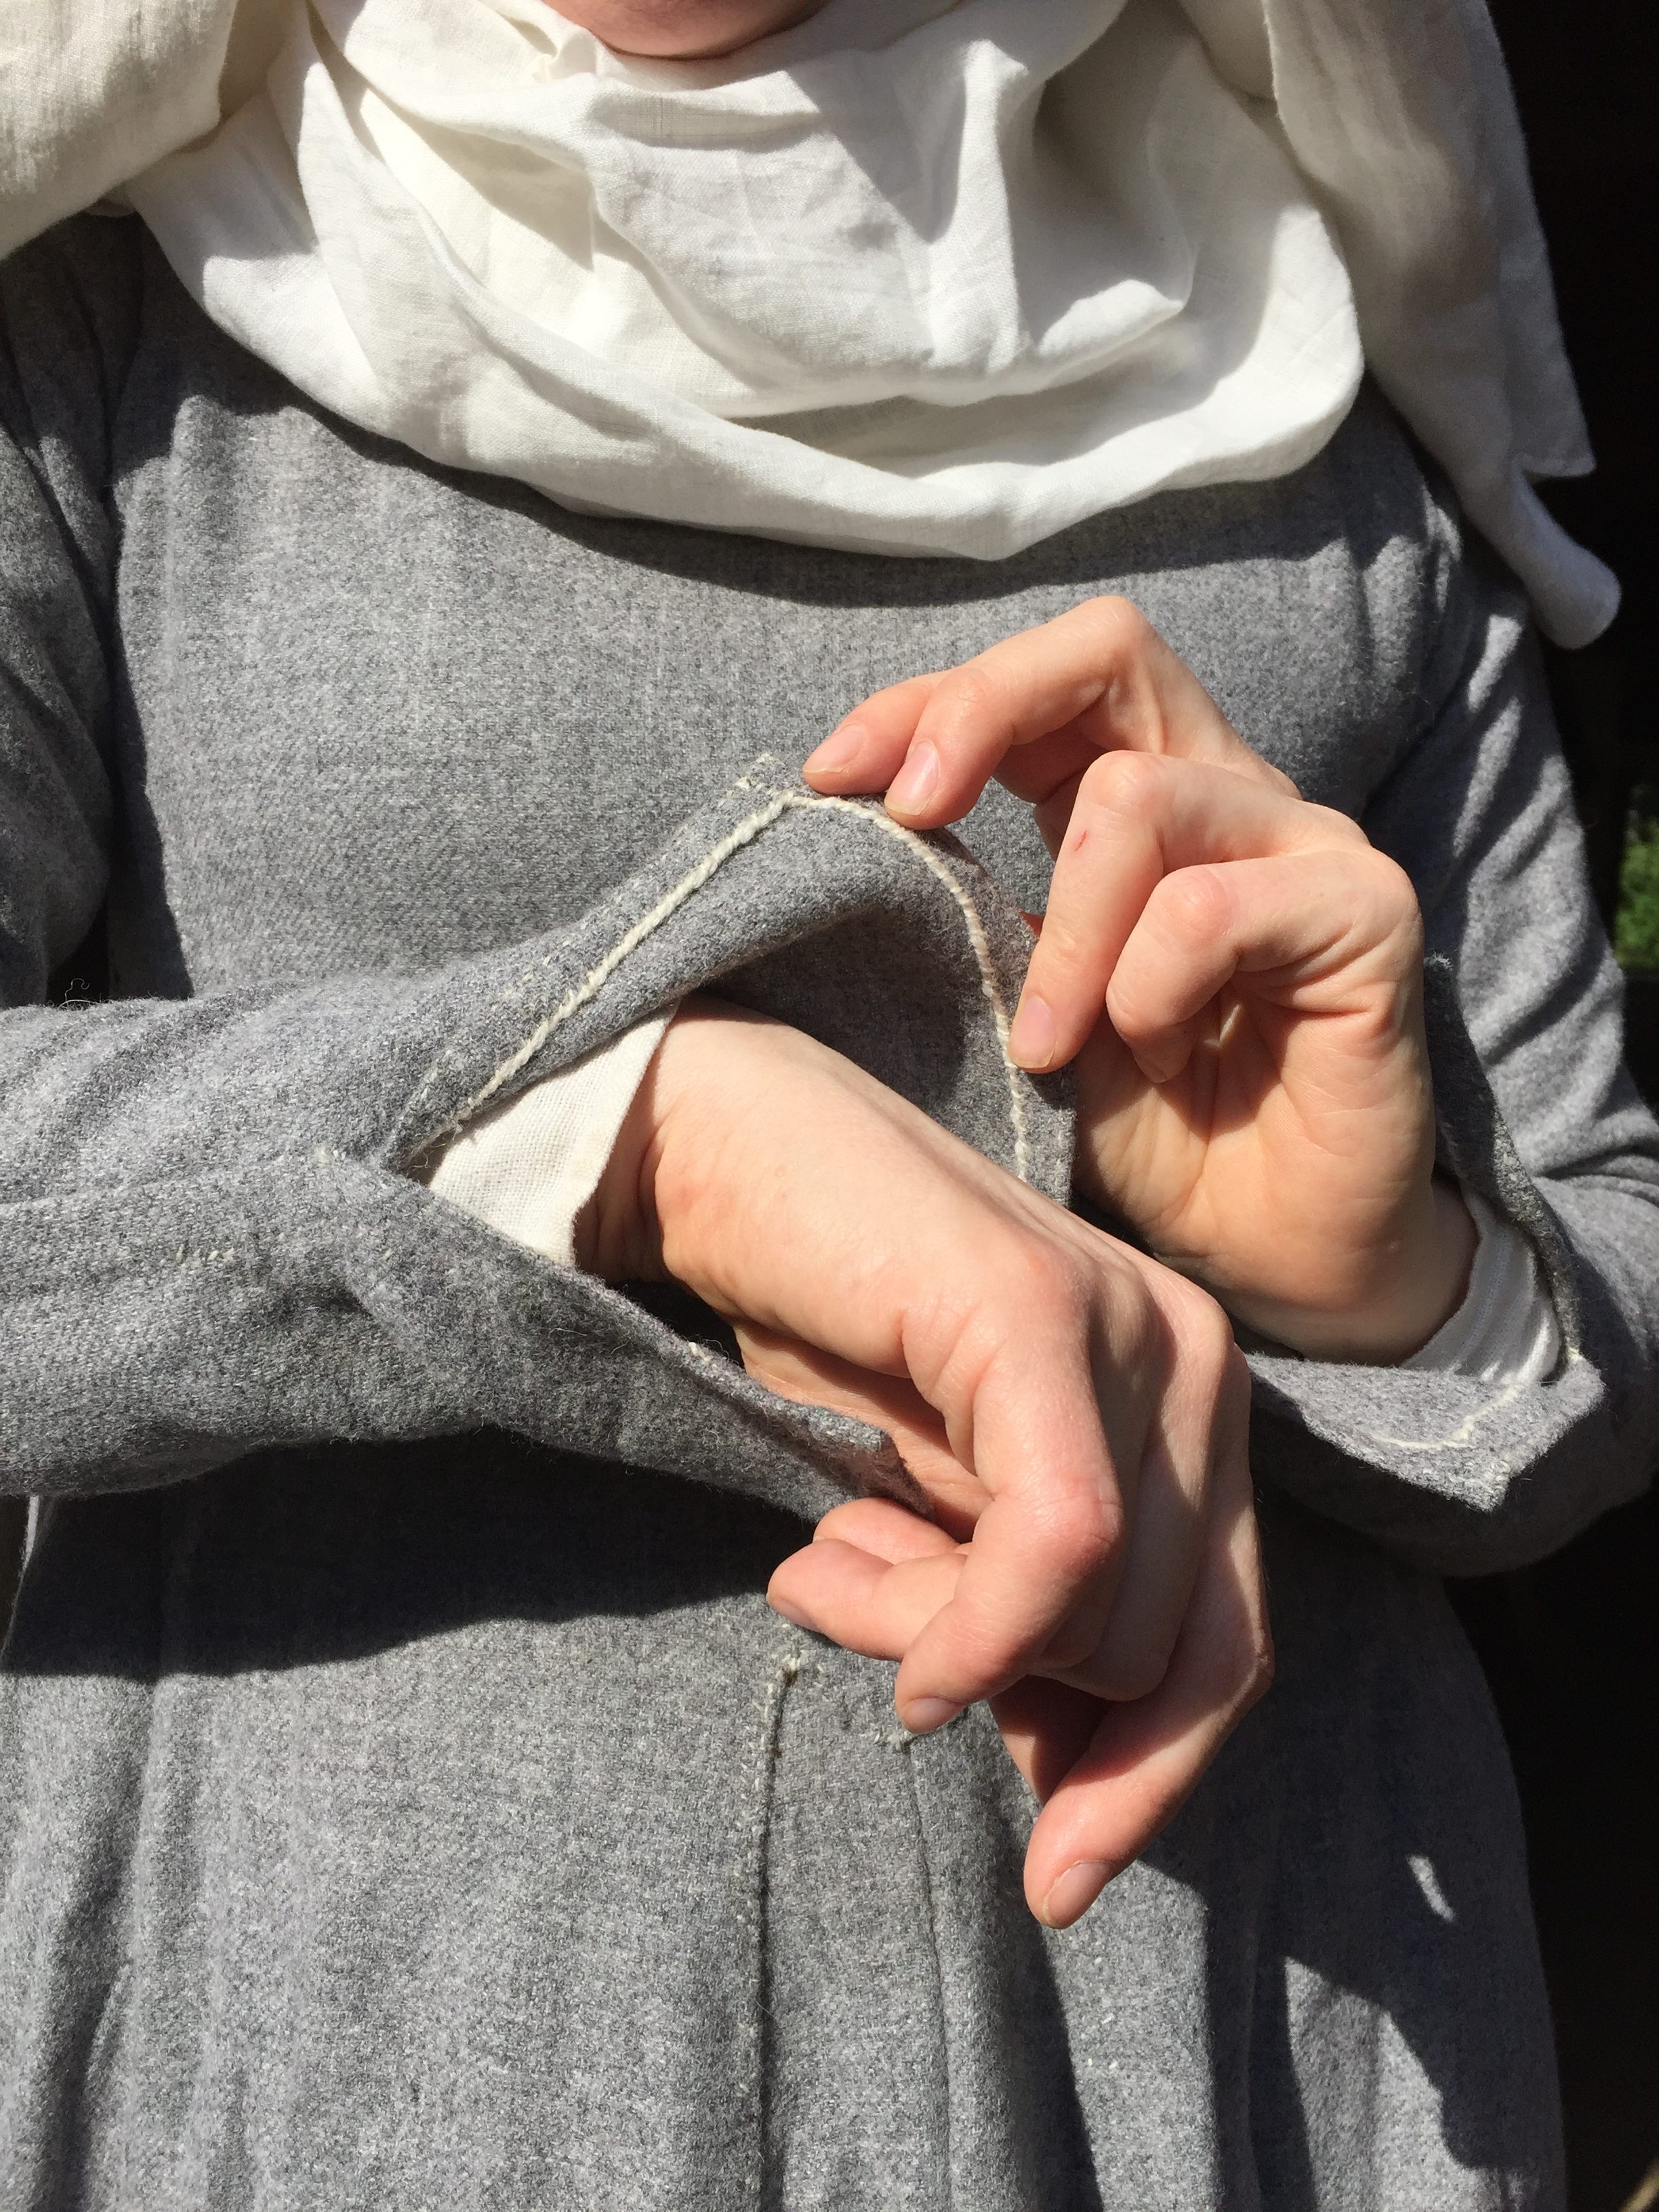
Tässä ei ole koristelua, vaan saumanvara on huoliteltu ompelemalla lanka helmapistoilla saumavaran reunaan.
This is not an ornament but just seam finishing by stitching a thread to the folded over hem. I only had white thread when (panic)sewing these last touches.

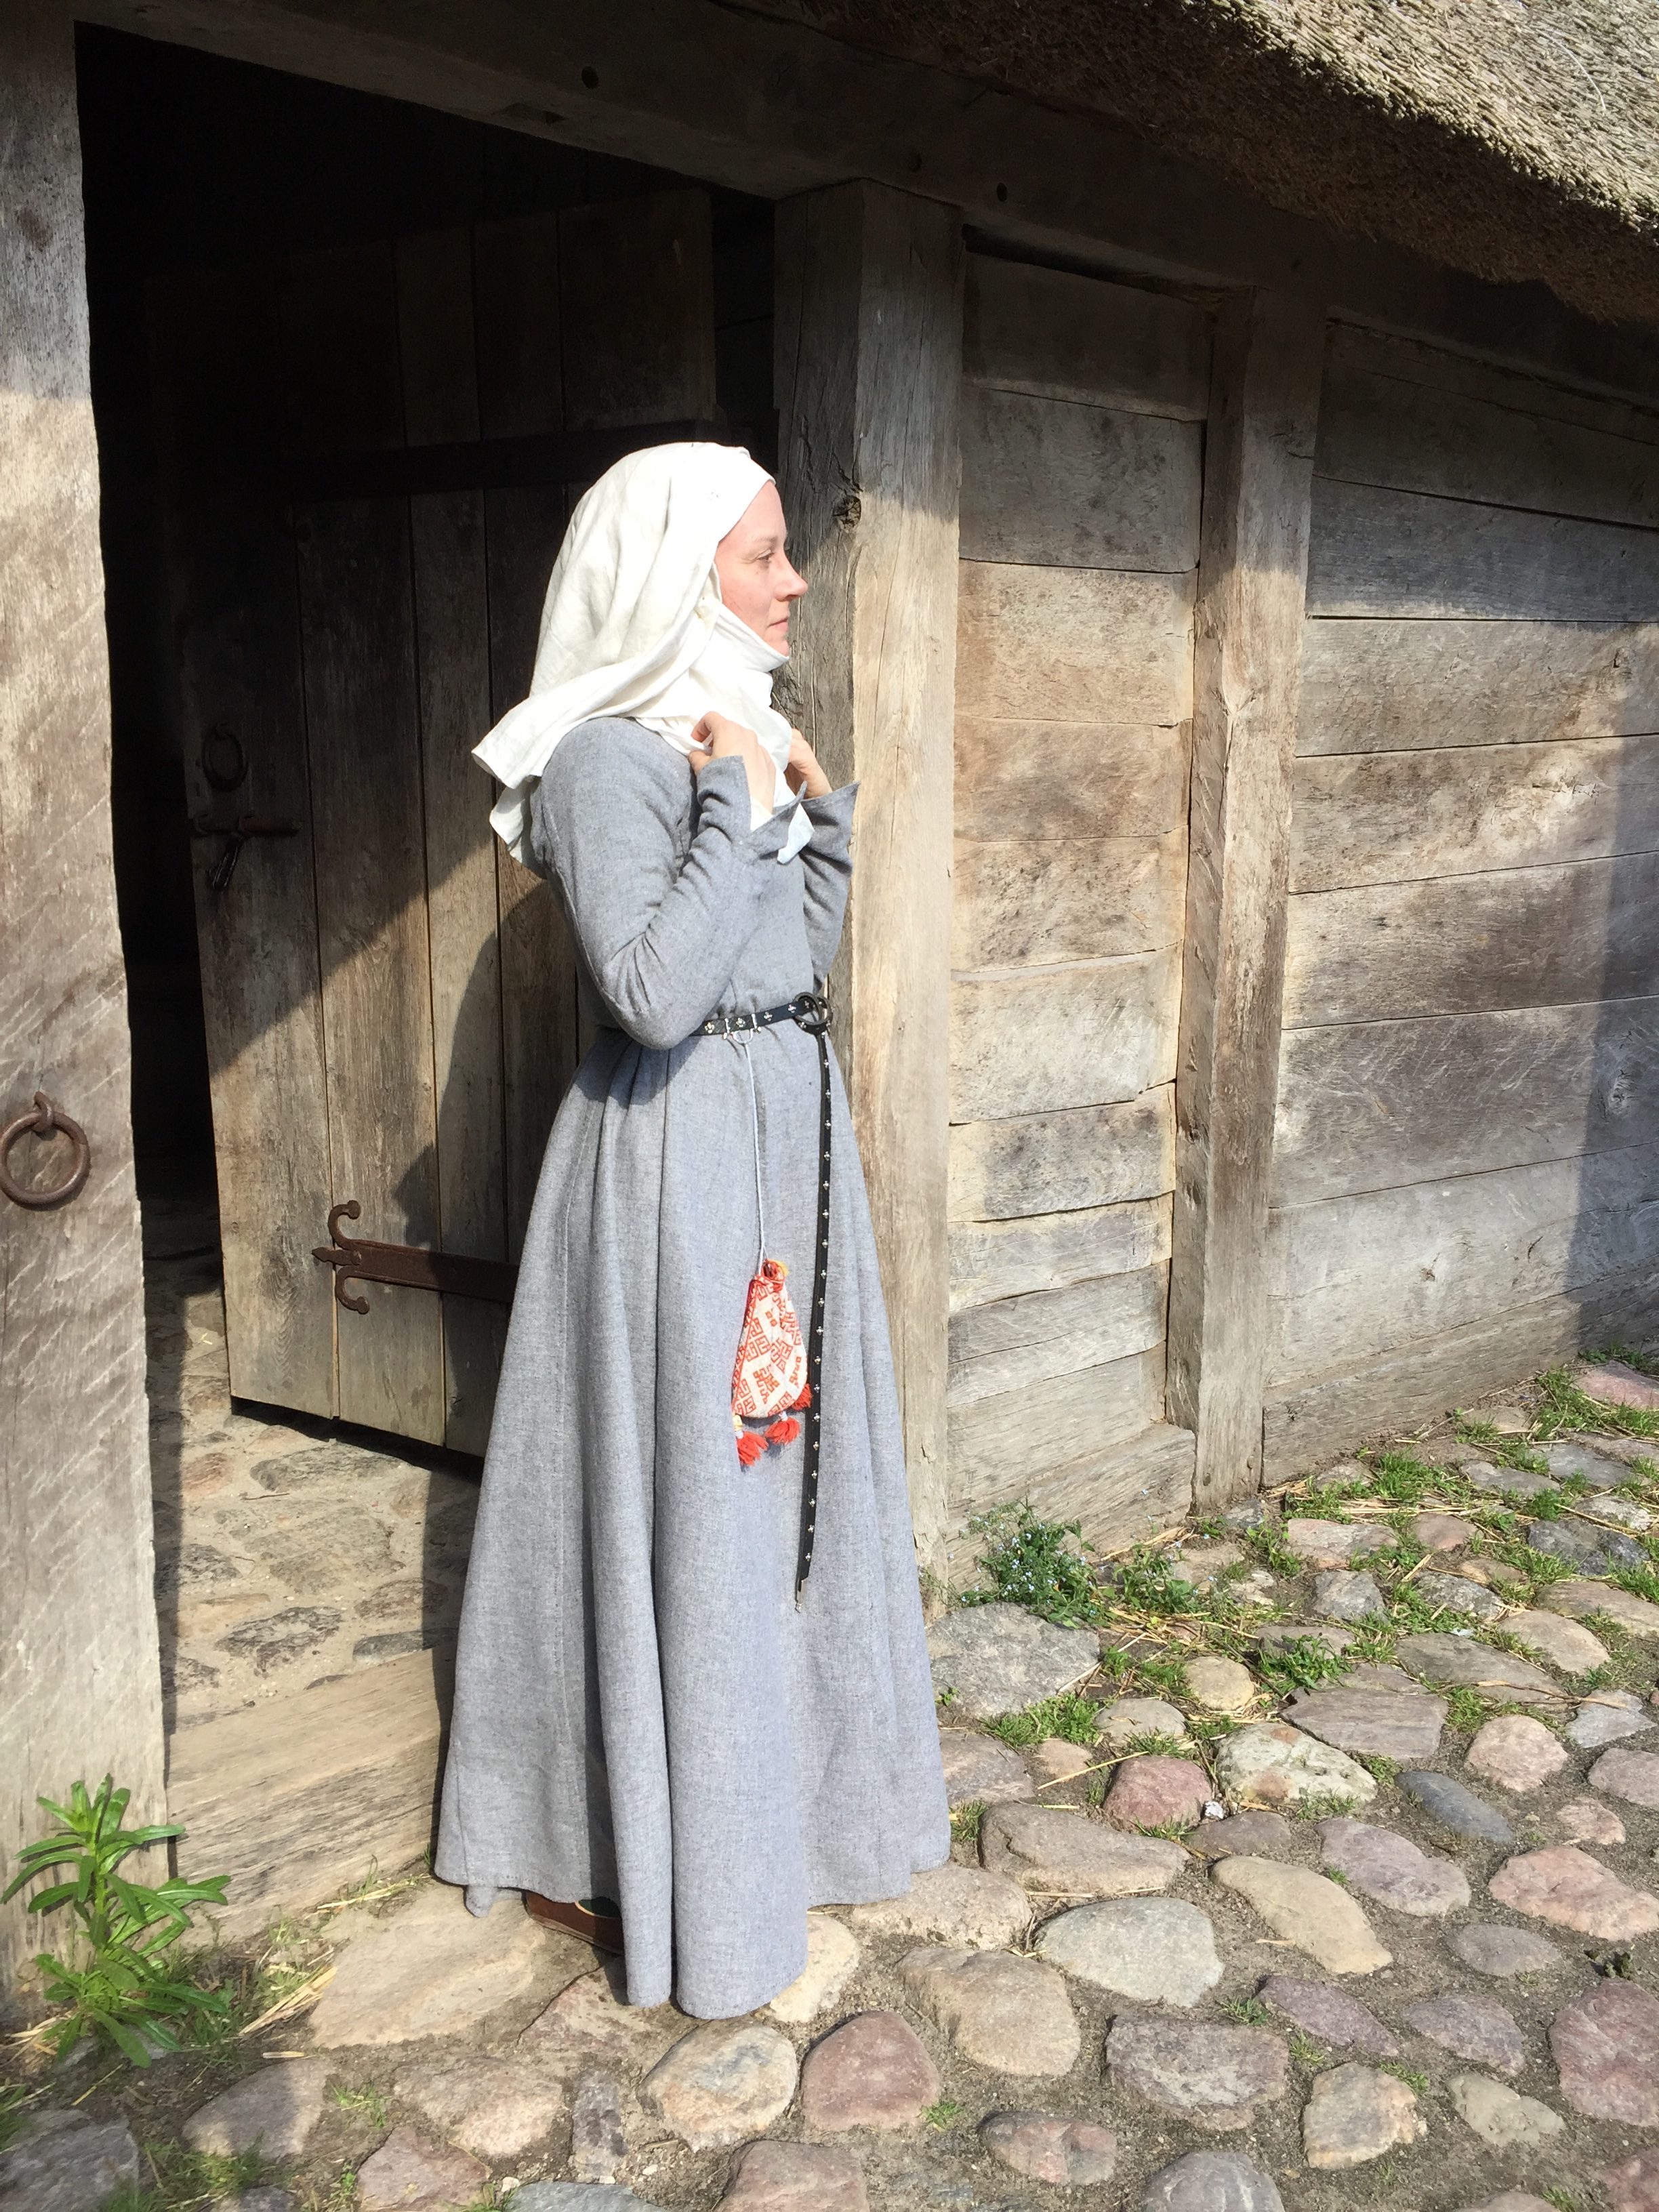
Tässä mekko tositoimissa, päällysmekon (jonka malli myös Herjolfsnesistä), hupun ja essun kanssa, helma vyötärölle rullattuna. Kamalan käytännöllinen asu!
This how I mostly wore it – under an overdress (the pattern for that one is also from Herjolfsnes) a hood (a London hood) and an apron, hems lifted onto a roll on my belt. It’s comfy and practical!

Lämpimämpinä päivinä käytin sitä ilman päällysmekkoa – niinkuin tässä kun pidin pellavaompelimoa juuri maalatussa Suutarin talossa.
When it was warmer I skipped the overdress, like on this day when I had my linen seamstress’s shop open in the newly painted house!

